
Zone Management
Zone Management
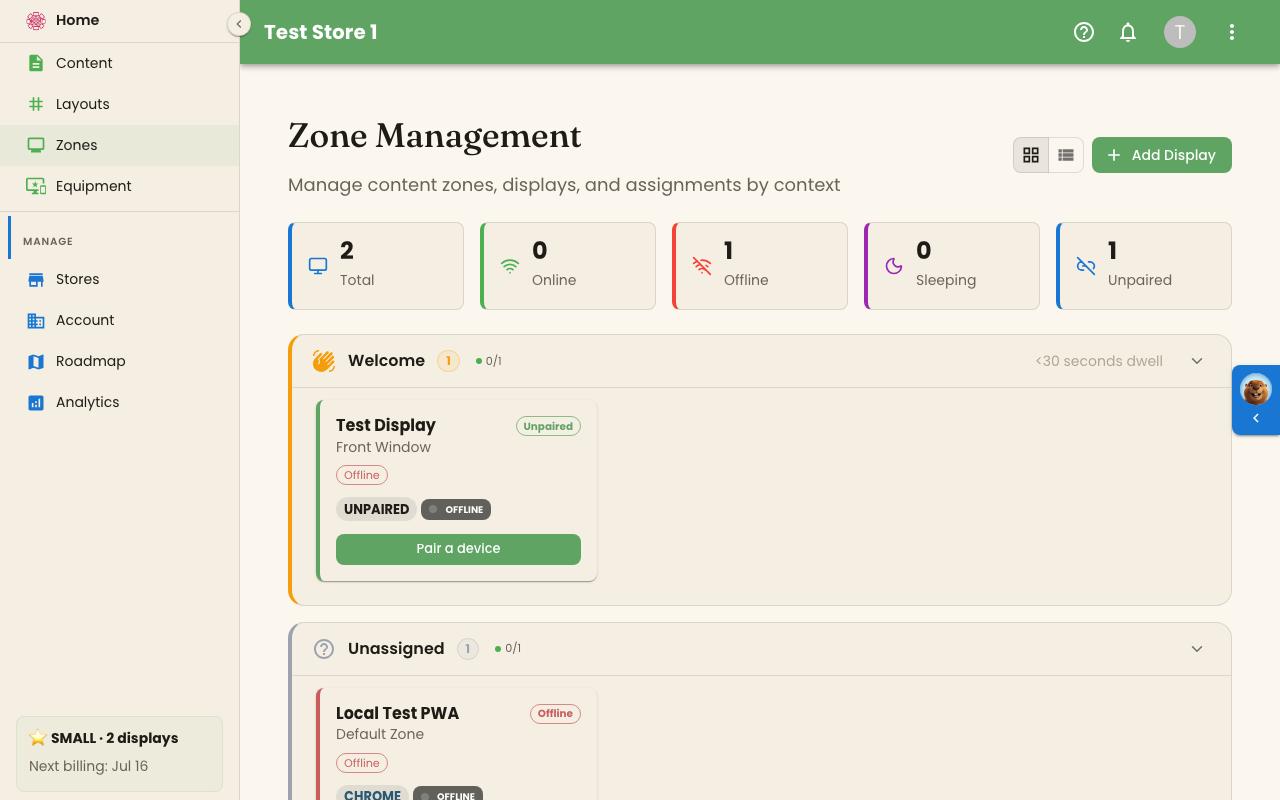
Section titled “Zone Management”The Zone Management page is where you manage every physical screen in your account. In the sidebar navigation this page is labeled Zones; the page itself is titled Zone Management with the subtitle “Manage content zones, displays, and assignments by context.” Displays are organized into zones — logical groupings that reflect where each screen lives and what audience it serves.
Fleet Health at a Glance
Section titled “Fleet Health at a Glance”Above the zone list is a single status summary strip that rolls up every display in your account into five counts:
- Total — every display in the account
- Online — connected to BrandCast right now and receiving content
- Offline — paired, but the display’s live connection to BrandCast has dropped
- Sleeping — currently inside a configured night schedule
- Unpaired — created in admin but no device has claimed them yet
The four status counts are exclusive and add up to Total. A display is classified in order: Unpaired first, then Sleeping if it is inside its night window, then Online or Offline. So a sleeping screen is never counted as Offline here — even while its own card chip reads Offline, which it usually does, because a sleeping screen stops answering the health checks that keep it marked Online. The strip is the only place a status count says Sleeping.
Use the strip to spot trouble before drilling into a specific zone.
Zone-Based Organization
Section titled “Zone-Based Organization”Your displays are grouped into expandable zone sections. Each zone header shows the number of displays it contains, an online-over-total ratio (for example 0/1), and — where configured — a dwell hint such as “<30 seconds dwell.” Click a zone header to collapse or expand its displays independently.
Zone sections are fixed — there is no free-form naming. Every display is placed into one of five zone types, each representing a screen’s role and typical audience dwell time:
| Zone | Typical use |
|---|---|
| Welcome | Entrance and lobby screens greeting visitors — short dwell, catch attention |
| Discovery | Browsing areas where customers explore options — medium dwell |
| Spotlight | Feature displays for a single product or promotion |
| Engage | Point-of-wait screens where customers spend longer |
| Internal | Staff-facing back-of-house displays |
Every account also has an Unassigned section that holds displays whose zone type has not been set yet.
Card and List Views
Section titled “Card and List Views”The toolbar in the top-right offers two view modes, toggled with the pair of icon buttons:
- Card view (default) — each display renders as a tile inside its zone section.
- List view — every display rendered as a single dense table with the columns Status, Name, Zone, and Device. Useful when you have many displays and want a compact scan.
Creating a Display
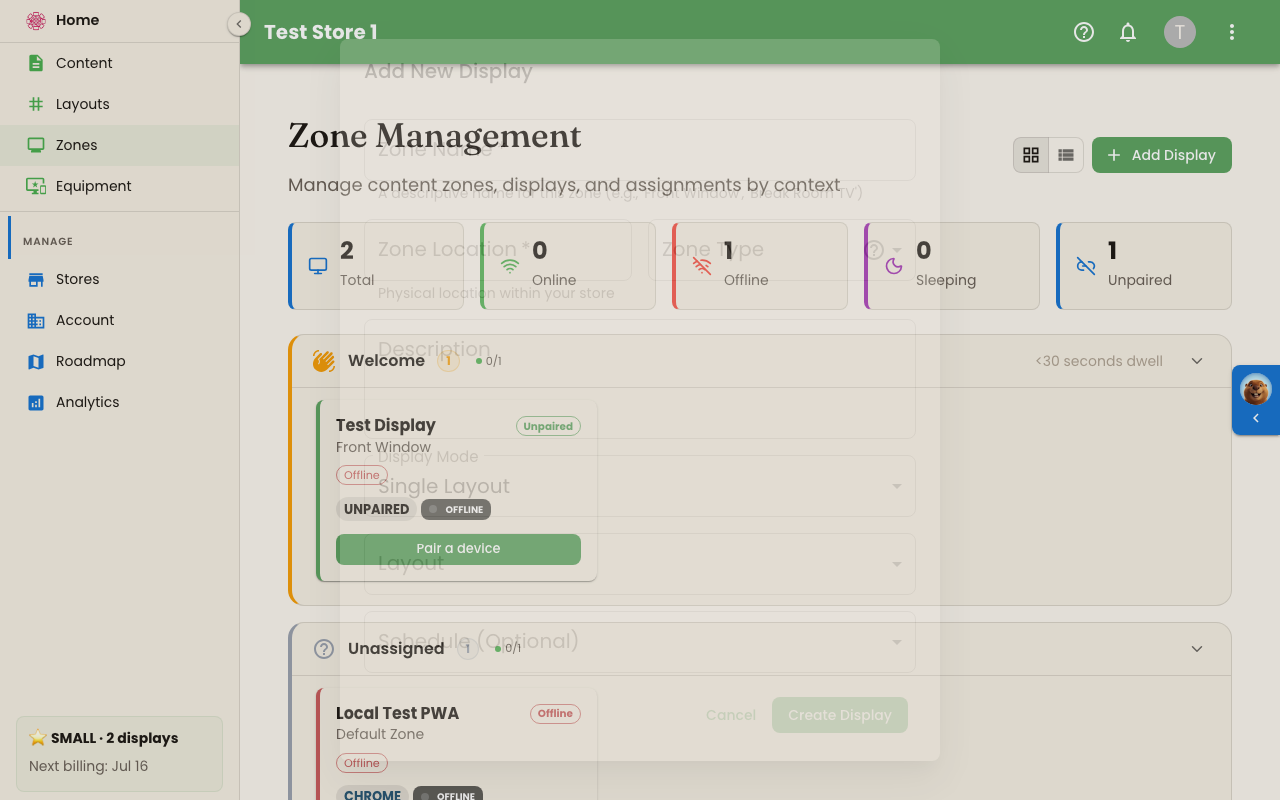
Section titled “Creating a Display”Click Add Display in the top-right corner to open the Add New Display dialog. Creating a display also creates the zone it lives in, so the form asks about both:
- Zone Name (required) — a descriptive name for the zone, e.g. “Front Window” or “Break Room TV”.
- Zone Location (required) — the physical location within your store.
- Zone Type — an optional category for the zone; scopes which Designs the screen’s calendar offers.
- Description — optional notes.
Click Create Display to finish. Content scheduling is set up afterwards in the screen’s detail panel.
Tip: Set the Zone Type now — it scopes which Designs appear in the screen’s week calendar.
Creating a display reserves the slot in your account. Creating a display is separate from pairing a physical device — pairing is its own flow, described in Pairing Devices.
Display Cards
Section titled “Display Cards”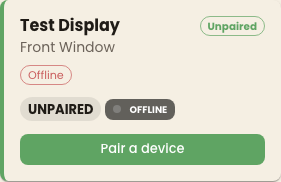
Each display appears as a card with:
- Name — the display’s label, with its zone shown as a subtitle beneath it.
- Status chip — one of three states shown as a small pill:
- Online — connected to BrandCast right now and receiving content
- Offline — paired, but the display’s live connection to BrandCast has dropped. A display running in a regular browser tab can show this briefly and return to Online on its own — see Troubleshooting.
- Unpaired — created in admin but no physical device has claimed it yet
- Night mode indicator — when a display is inside its night-mode window it shows a moon icon and a purple left border instead of the normal status color. The status chip still shows Online, Offline, or Unpaired.
- Device chip — the hardware type the display is running on, e.g. CHROME, PWA, ANDROID, or a Sentinel tier.
- Pair a device button — unpaired displays show a Pair a device button on the card. Use it to start the pairing flow for that display.
The card itself has no separate action icons — clicking anywhere on a card opens the Display Detail panel, which is where every action lives.
Display Detail and Actions
Section titled “Display Detail and Actions”Click any card to open its Display Detail panel, which opens as a full-screen overlay. This is the single surface for diagnostics, content, and configuration. The panel is organized top to bottom:
- Identity — the display name (with a Rename display pencil), the device type, and the Device ID. The Device ID matches the ID shown on the display in night mode; click it to copy.
- Telemetry — storage, temperature, and memory readouts. On PWA or browser displays these slots appear greyed out — the labels are present but values are not populated — with a note reading “Available on Sentinel devices.” Sentinel devices populate the actual values. A Show device details expander reveals the current screen resolution.
- Zone — a zone-type selector (Welcome, Discovery, Spotlight, Engage, Internal) that sets the screen’s role and scopes which Designs the calendar offers.
- Screen-week calendar — a Mon–Sun × 24-hour grid where you schedule Designs. Drag to create a Design block; drag a block’s edges to resize it; click × to remove it. Night-mode bands (hatched) mark the hours the screen is dark — content blocks can’t be placed inside them.
- Night Mode — while the screen is asleep, a Sleeping chip sits beside this heading and the panel’s health readout reads Sleeping in purple. The controls themselves are momentary overrides: Wake now (forces the display out of night mode immediately, clears at the next scheduled sleep) and Sleep now (forces it into night mode immediately, clears at the next scheduled wake). Night mode cannot be disabled — every display sleeps on a schedule. The per-day sleep and wake windows are edited on the week calendar above.
- Timezone — the current timezone with a Change button.
- Admin PIN — the display’s current PIN and a New PIN field to set a different one (4–8 alphanumeric characters, the same PIN used for BLE pairing).
- Troubleshoot — a Something isn’t working button that opens a guided check (see Troubleshooting).
- Make a change — Unpair · Change device on this display, which swaps the device while keeping the display’s name, zone, schedule, and content.
- Danger Zone — an expander revealing Delete Display, which permanently removes the display and its configuration. Paired devices are unlinked.
Tip: Changes to a Design’s Pages and changes to the screen-week calendar both propagate on the screen’s next sync — usually within a minute.
Scheduling Content
Section titled “Scheduling Content”Each screen plays Designs on a per-screen week calendar. To schedule content:
- Click the screen card to open the detail panel.
- In the Screen section, drag on a day column in the week calendar to draw a time window. Blocks snap to 15-minute intervals.
- Click the new block to assign a Design to it.
- Repeat for other days or time slots.
The screen picks up the change on its next sync — no extra save step.
Pairing a Device
Section titled “Pairing a Device”Creating a display reserves the slot; pairing connects it to a physical screen. Unpaired displays show a Pair a device button on their card. Clicking it opens the pairing page, where you enter the code shown on the device. The full step-by-step is in Pairing Devices.
What’s Next?
Section titled “What’s Next?”- Pairing Devices — Connect hardware to a display record
- Display Settings — Configure zone, night mode, and timezone
- Troubleshooting — Fix offline displays and content issues
- Scheduling Content — Use the screen-week calendar to control what plays and when